The HOLIDAYs are COMING!
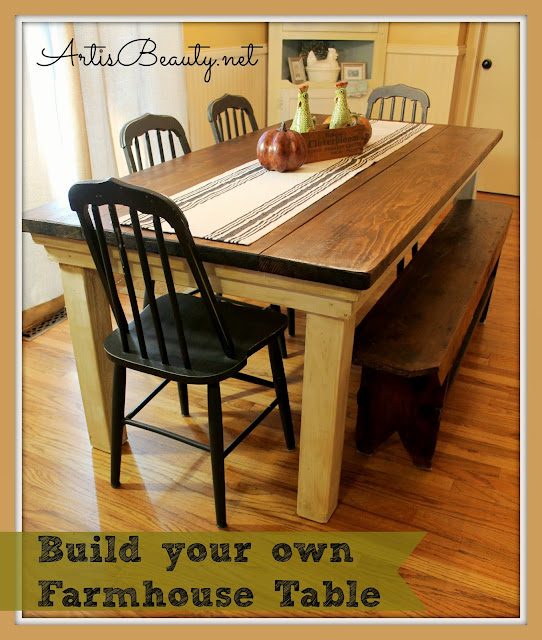
Make sure you have enough seating by BUILDING your OWN
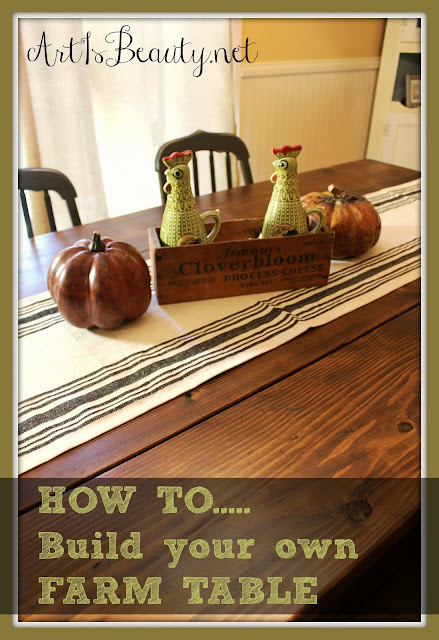
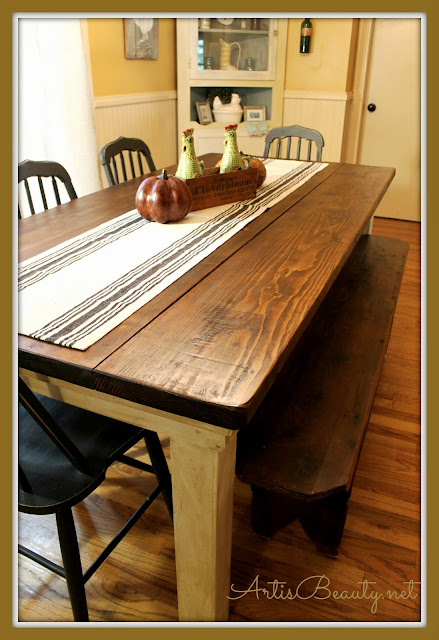
Farmhouse Table for under $100
I hope this will continue to be a normal stop in your DIY BLOG reading day.
Be sure to follow me on
and
G+
Also I have UPDATED this table since then.
You can see the updated VERSION HERE!
Good morning my Beauties! I hope you had a fabulous weekend.
My labor day weekend was FULL of labor.
I built this here farmhouse table for our kitchen and I helped my sister build a chicken coop for her chickens...No resting around here. :)
As for the table.........It has been on our bucket list for 2 summers...
and both summers came and went...and by golly...by labor day weekend I looked at hubby and said..NO MORE.....(pretty please with sprinkles on top)
Well...I had him hooked since I was going to use some reclaimed wood for the top.(you know the whole..it will hardly cost a thing...LOL) but when I went to get the reclaimed wood I was going to use. ..it was BADDD...like...crossing over to the other side bad...rotting all the way thru...HUH..
Guess we have to buy it new....:)
We had planned on using one of the Ana White Plans
so perfect...but you see ...we had one problem..
You see this GORGEOUS antique primitive bench ???
???
My beautiful Friend Erin, gave me this bench..
and said "do whatever with it".
Well my whatever was KEEP IT!!!
I loved it and couldn't let it go..
There was so much history in this bench..
So we had to BUILD the table around it..
It was a very long old bench and the numbers just were not working for us with the
Ana White plans and since the hubby and I have both built farm tables before we
decided to FREE STYLE!!! :)
You can see the outdoor patio farm table the Hubby built HERE
and you can see the Pallet Table I built in a similar style HERE

In order to make it work to the size we needed we figured it was easiest to go to Lowes
and just lay it out there on the floor and see what we needed. (since lumber is never ACTUALLY the size it says...a 2x4 is around a 1 3/4 x 3 3/4...so you can see why we were having difficulty trying to calculate what measurements we would need.
OFF TO LOWES IT WAS!!!!!!!!!
So as we laid all the pieces out we figured out how wide our legs had to be apart to fit the bench and could go from there to fit the table around the legs.
Here was our supply list...
4 2x10
2 1x4x6
2 1x4x4
3 2x3x8
2 1x2x8
1 1x2x6
2 4x4x8 FIR..for the legs
The total cost of the wood was $77.26 + tax
1 box 2 1/2 screws
1 box 1 1/4 screws

we started out by making our frame...or box for the table..this would help support the top boards and
give us something to attach the legs and support braces to.

Once we had our pieces cut for the box we pre drilled the holes to screw them together so the wood would not split. and screwed 3 of the long screws in to attach them.

Then it was time to cut the support braces...
They should all be the same size and thats because your box should be SQUARE..:)

We used 2 screws to screw in each brace to the top of the frame. Make sure it is level with the top so that you don't have your top boards floating above your frame.
Now its time to screw in the top boards..
We cut our top boards all the same size and from the bottom of the brace screwed from underneath
to attach the top boards to the braces.
We cut our top boards all the same size and from the bottom of the brace screwed from underneath
to attach the top boards to the braces.

Once they were on we were able to attach the legs, by gorilla glue ing them to the underneath of the table top and then side screwing them in from the brace..so 2 screws on each outside corner.
Instead of using some corner braces to hold the legs secure we cut 2 boards to fit in between the
legs and help affix the end boards to have a nice tight fit.

then we used the small 1x2s to make a decorative skirt around the table top to hide all the side screws..its basically just another frame around the outside.
 '
'NOW for the really fun part...The finishing...I wanted to have an old feel so I used chains

Then the belt sander
I wanted the old vintage feel.

Now normally I don't do the pre-stain cause I am usually dealing with old wood,
but since this was new pine I didn't want it to be all blotchy..so I used the conditioner before I stained it. It worked amazing and was such a quick step. You just wipe it on and after about 5 minutes you can start staining.

I used provincial stain for the top and when it was dry a couple coats of nice satin poly.
For the legs I did a coat of CeCe Caldwells Vintage white, with a top coat of
Omaha Ochra..distressed waxed and buffed and she was ready to go inside.

I am so thrilled with how she turned out..its unbelievable...I mean..I don't know why I waited so long.
You guys all know how furniture MEANS so much to me..and I was ecstatic to have a table
that means so much to me now..knowing that the hubby and I created this for our family.
To have our family dinners around...kids doing their homework..all the memories..

I hope you enjoyed this LONG WINDED...heavy with pictures post.
I hope it inspires you to go out and build something and do something
that you have been putting off...
Have a BEAUTIFUL day..Until next time..
Hugs
Karin
http://www.remodelaholic.com/2013/09/washi-tape-home-decor-ideas/#linkparty


4 comments:
Can you tell me the final dimensions of this table? It's absolutely beautiful.
In the supply list it says 4 2x10. is that a 1x2x10?
What measurements did your table end up being?
Absolutly love the table.
I am a DIY girl and do lots of projects around my home. I am very shortly going to renovate my kitchen and put in a window seat with Book ends on either side. Any helpful hints would be appreciated.
Sylvia From New Zealand
Post a Comment