Showing posts with label french. Show all posts

Tuesday, October 9, 2018

Updating Husbands Plain Dresser to a Fabulous French Beauty


This post is a sponsored post or  uses affiliate links to help you find the products I trust and love


Vintage beat up old dresser Makeover Chalk paint, Mineral paint wax and distressed before and after
Welcome back my Beauties.
I'm jumping on real quick to show you how I quickly I transformed my husbands old dresser.
I had painted it way back in 2012 and it stayed this way until now.
Vintage classic white dresser makeover with espresso stained top chalk mineral paint wax and distressed shabby chic farmhouse style


You can see my Husbands Dresser Makeover HERE
You can see there how I took it from the beat up old state it was in to the simple white and dark stained top.
It worked great for us, but my husband wanted something a little more masculine and something with more that 3 large drawers.
When I found a piece that worked for him,
I figured I would just put this in my booth and sell it as it was.
But recently I discovered a fun new thing and decided this was the perfect piece to use this new thing on. :)
The NEW THING of course would be these fun colorful 
Furniture Transfers.
Redesign by Prima vintage color transfer for furniture Makeover before and after diy blogger

Like I showed you in my last makeover of this vintage Farm and Floral Dresser
https://www.artisbeauty.net/2018/10/persian-blue-vintage-farm-and-floral.html
Once I found out about these transfers I was hooked.
If you follow me on INSTAGRAM you will see me playing with them and putting them on my furniture as I work along. 

Mme Boileve Vintage inspired color transfer french dresser makeover diy
It takes patience but its worth it in the end.
I love how just adding this totally transformed the simple piece of furniture.
redesign by prima vintage french postal dresser makeover before and after diy
I love the subtle colors and vintage script so much.
You can see all the different types by clicking HERE


transforming a dresser with a vintage graphic redesign by prima french transfer
I was so happy to discover them!
Plus I am happy to add that I brought this beauty into my booth and she is now sitting pretty in someone's home!
I hope you enjoyed this quick little makeover.
It warmed up and I have been back out in the garage working on more before the snow flies.
I hope to be back soon with another fun one!
Until next time,
Have a BEAUTIFUL day! 

Thursday, November 17, 2016

Vintage French Postage Table Makeover ~Themed Furniture Makeover!


This post uses affiliate links to help you find the products I trust and love
Welcome back, my Beauties!
It's one of my favorite days of the month!
Themed Furniture Makeover Day! 

Our THEME this month is "WORDS"
I was wondering what I was going to do with this months theme until this little table from the thrift shop came around!

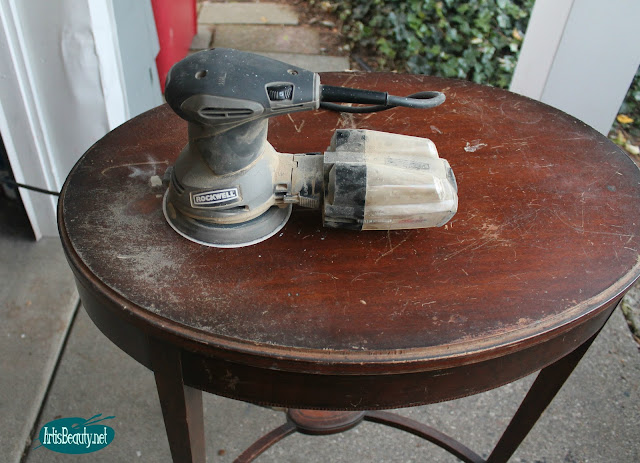
ROCKWELL RANDOM ORBITAL SANDER FRENCH POSTAGE PARLOR TABLE PAINTED MAKEOVER STENCIL

The last few months have been a blur with everything and I wasn't sure I was going to be able to participate this month.
I was trying to get stuff ready for my booth for the Holiday season,
and get ready to go to my Moms house in Florida to get it ready to sell. Needless to say I was stressed. 
But then as I was walking through the thrift shop I spied with my little eye, this adorable vintage parlor table.
I loved the oval shape of it and the fact that it had lived a good life!
I brought it home and grabbed my sander and started taking the old scratched and grooved finish off the top.
DECO ART AMERICANA DECOR COLOR STAIN CHARCOAL TABLE FINISH SEALER IN ONE DIY

Next I grabbed some of my new favorite Deco art color stain.
Its self sealing so I don't have to worry about putting a top coat on it! I chose to do a lighter with a darker over the top for the second coat.

AMERICANA DECOR FRENCH POSTAGE STAMP STENCIL DIY PAINT TABLE MAKEOVER BEFORE AND AFTER MOULIN ROUGE
Once the stain was dry I could work on the WORDS part of my project.
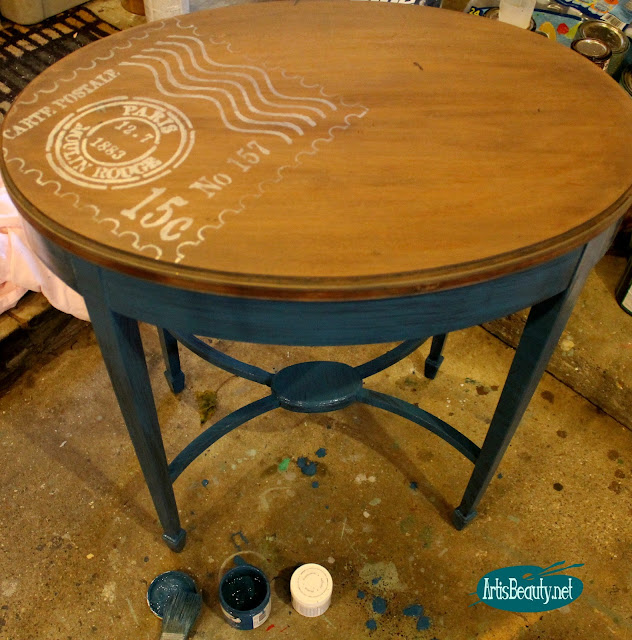
I grabbed this cute French Postal stamp stencil and some pearl white acrylic craft paint and put down my WORDS.

French postage vintage stamp stencil table top makeover stain color paint artisbeauty diy furniture girls themed makeover

Once I had my stencil down it was time to paint my base.
americana decor chalky finish blue paint french stencil postage vintage parlor table makeover diy furniture girl

I chose Americana Decors Chalky finish in LEGACY.
It was the perfect Blue for this table and then I finished it off with a matte varnish.

I just LOVED how it all came together!
carte postale moulin rouge paris 15 cent stamp stencil parlor table makeover stain paint diy before and after
 The tiny bit of the pearlized paint off the wood with 

This post uses affiliate links to help you find the products I trust and love
the dark blue paint.
french vintage carte postal moulin rouge stencil table top makeover diy paint stain finish before and after karin chudy

 It looks like it was always meant to look like this.
legacy blue chalky finish paint parlor table makeover diy furniture girls frech carte postal pearlized acrylic paint stencil

diy french vintage postage stamp parlor table makeover before sanding staining diy
I hope you enjoyed my "WORDS" makeover
and I sure hope you hop on over to all my friends to see what they transformed with WORDS!
Until next time;
have a BEAUTIFUL day!

Monday, March 28, 2016

DIY French Wine and Wine glass carrier made from Pallets.


This post uses affiliate links to help you find the products I trust and love
Hello my Beauties!
I am so excited to be back with you to share this great Pallet Project.

Being a connoisseur of FREE things, I love to be able to make something fun and functional with pallets!
Come see how I used this FREE Food Grade Pallet to make this Beautiful French DIY Wine carrier.


Here you can see my free food grade pallet.
( I like to use food grade because they don't have the harmful chemicals in them)

 To get the pieces I needed for my wine carrier I just used my Rockwell circular saw and cut off my pieces.


Once I had all my pieces cut I laid out my design to see how big I wanted it.
You can see here I brought out an old wine bottle and my glasses to make sure I gave myself room to get these in and out of the carrier.
Once I decided on my size I made a few small cuts to even things out and then used my Ryobi Airstrike nailer to shoot some nails into to quickly hold it together.
Knowing I was going to be tying some rope as the handle I just used my drill to drill two holes in the top standing boards.

Once I had it all prepped I could stain it using my favorite color, Rustoleums dark walnut stain
and tie a handle with my sisal rope.


To "FRENCH" it up I just used an old french stencil I had laying around and 
stenciled this on the front.
I just love how rustic yet charming it looks and functional as well.

And it was all made from free pallets. 
I hope you liked this latest project.
I had so much fun creating something from a pallet laying on the 
side of a building.
I hope you all have a wonderful weekend!
Until next time,
Go make someones day Beautiful!

Y

Thursday, February 25, 2016

Inspired by Chocolate, French Parlor Table Makeover


Welcome back my Beauties!
Today is the day for another DIY Furniture Girls
Themed Makeover.
This months THEME is CHOCOLATE.
How I DO LOVE ME SOME CHOCOLATE!


This was the table I started with.
It was less than beautiful.
It had been beaten up pretty bad but I love the simple little shape of it.

Since I knew I was going to be staining the top a Rich Chocolate color I needed to get the old finish off.
I used my Rockwell orbital sander to make quick work of it.
The finish was so old it only took about 30 seconds for all of the finish to come off.


 Once I had the old finish off and it was clean I could start staining it. 
I started making over the top by using Repurposed Stain in Cast Iron Black


While the top was drying I painted the base using Americana Maxx Gloss in Melon


Now that the top was dry I could start transferring my graphic to the top.
I grabbed some carbon paper   and started tracing my French Chocolate graphic from the Graphics Fairy. After tracing I used white acrylic paint to paint on my lettering.
After a little distressing I sealed the top with some General finishes Satin finish and she looked good enough to eat!


She looks a bit different now doesn't she?


The hardest part of the makeover was NOT eating the Chocolate while I was photographing.


I hope you enjoyed this makeover and you will check out the rest of my DIY Furniture Girl Friends 
Makeovers!
We would LOVE to hear what you think!