Welcome back my Beauties!
I have been working on a Kitchen makeover (which I am not ready to show yet) and decorating a new space in it.
So today I am going to show you how to make the LARGE
DIY Quote art without a Cutting machine!
Now be warned. This project takes patience; but if I (the least patient person in the world) can do it, so can you!
This post is a sponsored post or uses affiliate links to help you find the products I trust and love
First off, decide on what quote you want.
I loved "eat well travel often" but my husband has been a homebrewer for 20 years and he wanted "Drink Well Travel Often"
so I decided that would be a good quote too.
Next, since it's LARGE Art, I chose a
You can Order them or do like me and use your Coupon at the local craft and hobby store and get them CHEAP!
I think mine ended up being $18 with coupons.
Then you choose your stencils. I went with
Again, on sale and with coupon I think my stencils cost me $4
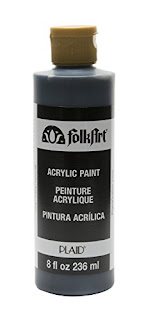
And last, you will need some cheap acrylic paint.
I had that at home but you can buy it for about a buck at the local craft store
That puts my project just under $25
Pretty cheap for some large scale art!
Now here is where the patience is gonna be needed.
First lay out your stencil quote to decide on spacing.
I will tell you honestly,
I had planned on having the artwork be Portrait style,
but in my usual fashion, I changed my mind on what stencil I wanted as I was walking out the store not thinking about the fact that the new letters were bigger than the original ones I had and didn't measure those out in the store..
I got home and realized that but a quick fix was just to turn the canvas the long way...WHEW!
Next step is for more patience.
I have been making signs for years and one of the biggest tricks is to start in the center.
It's kind of like when you do tile work. You measure out from the middle.
So just like ALL things in Life....Find your CENTER
and work from there.
Since "DRINK" was a 5 letter word I knew the letter "I" would be the center.
I put that in the center and painted that one on.
Then, since you are dealing with WET PAINT you have to wait for it to dry before you lay your next letter down so you don't smudge.
(I told you patience was KEY)
I will also tell you that I sped things along with a blow dryer.
I told you...I am not PATIENT! :)
So each letter goes on, gets dried and you work out from the middle.
But the patience paid off.
I now have my LARGE DIY Quote Art
hanging in my new space in my kitchen.
(I promise to be back SOON with that space)
I hope you like this DIY and I can't wait to see what you make!
Until next time,
Go make someone's day BEAUTIFUL!


0 comments:
Post a Comment