Showing posts with label craft. Show all posts

Wednesday, May 20, 2020

DIY VINTAGE BRICK WALL DECOR -QUARANTINE CRAFT EDITION


This post is a sponsored post or  uses affiliate links to help you find the products I trust and love.
“As an Amazon Associate I earn from qualifying purchases.” 

VINTAGE BRICK WALL ART USING BRICK PANELING GENERAL FINISHES PAINT AND REDESIGN BY PRIMA VINTAGE TRANSFERS
Well, Welcome back my Beauties!
How the heck have you been?
I have been keeping busy and trying to be somewhat productive during quarantine, but some days I am more productive than others.
Actually, seems like some MONTHS I am more productive than others :)

https://www.artisbeauty.net/2020/04/diy-marushka-inspired-mountain-wall.html

If you remember it took me quite a while into quarantine to really start accomplishing any real projects.
You can see my DIY Mountain Wall Mural 
and read all about that lack of motivation there.
But once I did that I slowly started to work on more things.
I did a piece of furniture for my booth for when we can reopen and
I started working on smalls.
While I was working on those I started wondering what I could do with my old Vintage Brick artwork I had made
seen below.


We had changed up our Den and I had taken the dark brick wall art that I had made down.
I made them from Brick Paneling and stencils to look similar to my art studio that you can see below.


https://www.artisbeauty.net/2014/12/play-room-turned-art-is-beauty-art.html


But I wanted to change out the dark brick on the artwork
before I added my transfers.


and covered up the old stencil art and lightened the brick.
When it was dry I decided on which transfer I wanted to use.


VINTAGE BRICK WALL ART USING BRICK PANELING GENERAL FINISHES PAINT AND REDESIGN BY PRIMA VINTAGE TRANSFERS

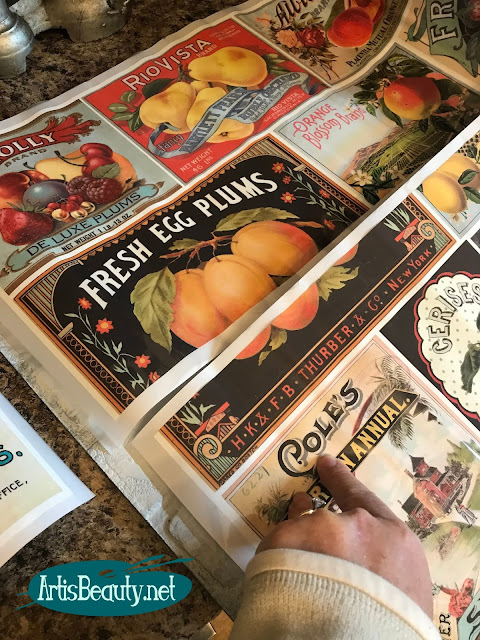
REDESIGN BY PRIMA VINTAGE FRUIT ADVERTISEMENT TRANSFER ON BRICK WALL PANELING
I cut out which one I wanted and placed it on the brick.
I followed the instruction and rubbed on the transfer.
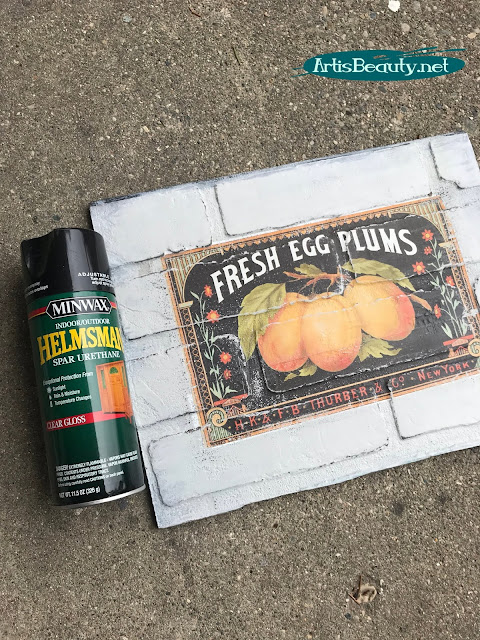

SPRAYING VINTAGE TRANSFER ART TO PROTECT ON BRICK PANELING
After I rubbed it on I lightly sanded it to distress it and the brick.
To seal it I used my Spar Urethane to seal it.
When it was dry I put the frame back on and now its ready for the booth when we open.

Diy vintage brick wall transfer art quarantine craft edition artisbeauty.net


I just love the vintage advertisements and how easy it was to do this project.
DIY VINTAGE TRANSFER ART USING BRICK PANELING PAINT AND REDESIGN BY PRIMA TRANSFERS
Now I am trying to figure out what else I can put my transfers on.


DIY VINTAGE TRANSFER ART USING BRICK PANELING PAINT AND REDESIGN BY PRIMA TRANSFERS AND GENERAL FINISHES MILK PAINT

I hope you enjoyed this quick little craft DIY and that you are all staying healthy! 
VINTAGE BRICK WALL ART USING BRICK PANELING GENERAL FINISHES PAINT AND REDESIGN BY PRIMA VINTAGE TRANSFERS
Until next time,
Stay Safe,
Stay Healthy,
and have a Beautiful day! 


Sunday, February 5, 2017

DIY Quote ART without a cutting machine


home decor Diy Large scale Quote art without a cutting machine BOHO CHIC drink well travel often wanderlust diy
Welcome back my Beauties!
I have been working on a Kitchen makeover (which I am not ready to show yet) and decorating a new space in it.
So today I am going to show you how to make the LARGE 
DIY Quote art without a Cutting machine!
Now be warned. This project takes patience; but if I (the least patient person in the world) can do it, so can you!
This post is a sponsored post or  uses affiliate links to help you find the products I trust and love

First off, decide on what quote you want.
I loved "eat well travel often" but my husband has been a homebrewer for 20 years and he wanted "Drink Well Travel Often"
so I decided that would be a good quote too. 
Next, since it's LARGE Art, I chose a 
You can Order them or do like me and use your Coupon at the local craft and hobby store and get them CHEAP!
I think mine ended up being $18 with coupons.
Then you choose your stencils. I went with

Again, on sale and with coupon I think my stencils cost me $4

http://amzn.to/2kzKfCh
And last, you will need some cheap acrylic paint.
I had that at home but you can buy it for about a buck at the local craft store

That puts my project just under $25
Pretty cheap for some large scale art!

drink well travel often word art large scale diy canvas art boho home chic decor

Now here is where the patience is gonna be needed.
First lay out your stencil quote to decide on spacing.
I will tell you honestly,
I had planned on having the artwork be Portrait style,
but in my usual fashion, I changed my mind on what stencil I wanted as I was walking out the store not thinking about the fact that the new letters were bigger than the original ones I had and didn't measure those out in the store..
I got home and realized that but a quick fix was just to turn the canvas the long way...WHEW!


drink well travel often giant word art diy stencil canvas paint
Next step is for more patience.
I have been making signs for years and one of the biggest tricks is to start in the center. 
It's kind of like when you do tile work. You measure out from the middle. 
So just like ALL things in Life....Find your CENTER 
and work from there.
Since "DRINK" was a 5 letter word I knew the letter "I" would be the center. 
I put that in the center and painted that one on.
Then, since you are dealing with WET PAINT you have to wait for it to dry before you lay your next letter down so you don't smudge.
(I told you patience was KEY)
I will also tell you that I sped things along with a blow dryer.
I told you...I am not PATIENT! :)
So each letter goes on, gets dried and you work out from the middle.
drink well travel often BOHO WORD ART eclectic home decor do it yourself diy wall art

But the patience paid off.
I now have my LARGE DIY Quote Art 
hanging in my new space in my kitchen.
(I promise to be back SOON with that space)
I hope you like this DIY and I can't wait to see what you make!
Until next time,
Go make someone's day BEAUTIFUL!

Monday, November 7, 2016

DIY Vintage Driftwood Shiplap Copper Christmas Signs.


wood joy and noel cut out words diy craft target

Welcome back my Beauties!
Its beginning to feel a lot like CHRISTMAS!!
Just kidding...its not..
and most likely this will be the ONLY Christmas decor post I do.
Plus I usually don't do them before Thanksgiving just on a personal principle but I will be gone for 2 weeks in Florida
closing down my moms house there, so we can sell it now that she is gone.
I figure I am not going to feel Real Christmasy when I get back 
from there and I will be getting home only a few days before Thanksgiving.
Being gone that long will also mean that I have to play MASSIVE catch up back home once I get back.
So that means I will be in Furniture painting BEAST MODE for the store. 
So there is you reasoning for my EARLY Christmas post.
(also if you could say a little prayer or send some good vibes my way, I am VERY VERY nervous and sad about closing down my moms house. If you have been following me all these years you know how many memories we have with my momma down there.
This will be the very first time I step on her porch and not have her there to hug me. It will also be the last time we see the place as it will be up for sale and will all take place while we are back home.)

Now that I got that off my brain, lets move on to the project. 
joy noel vintage driftwood shiplap diy craft christmas sign
You can see me here measuring how much room I would need for each word before I cut the boards. I used my AIRSTRIKE to nail the two ship lap pieces together.
Way back this summer, we were at our friends property on Lake Michigan. As is our usual we walk the beach looking for driftwood.
The kids run ahead and see if they can find any good pieces for MOM.  Well this year we found a bunch of sea grass rolled up in balls on the shore and in between them washed up were a bunch of broken pieces of vintage shiplap! Somehow they had floated ashore on the beach and I was glad to do a little beach cleanup and take the driftwood shiplap home with me.
When the kids asked me what I was going to do with it,
I casually said..."Oh, I will probably end up using them for Christmas signs" .

makita mitre saw vintage driftwood shiplap diy christmas signs joy noel coppe

Fast forward 4 months later and I am shopping at Target in the dollar spot and they have these cute little cut out wood "JOY" and "NOEL" signs for just a few bucks. 
My brain went into create mode and said.."SHIPLAP"
I got home grabbed my shiplap and got out my Mitre Saw
and cut them into the size I needed to fit the words.
devine color valspar radiant metals copper spray paint christmas signs joy noel vintage shiplad driftwood craft diy
Then I grabbed my copper spray paint and sprayed both of the words with it.
While those were drying I dry brushed my driftwood pieces so that the copper wording would pop.

ryobi airstrike brad nailer valspar spray paint diy christmas shiplap signs copper craft

Once everything was dry I used my Ryobi Airstrike nailer to attach them to the driftwood.
vintage driftwood shiplap copper joy christmas sign diy karin chudy artisbeauty craft airstrike
I love how the copper is so warm against the worn whitewashed ship lap.

Driftwood shiplap vintage copper noel christmas sign glitter sparkle home decor diy crafts
I had made these to sell, but I am kinda in LOVE with them,
and I am thinking I either need to make a few more or just keep it. 

noel and joy vintage driftwood shiplap christmas signs diy artisbeauty copper spray paint makeover airstrike nailer
 Here they are sitting on my mantle. 
Which honestly might be as decorated as it gets this Christmas.

driftwood vintage shiplap copper christmas joy noel signs handmade artsibeauty karin chudy spray paint dry brush
I hope you enjoyed this fun little Christmas Craft.
Hopefully, things go well in Florida.

Until next time, 
Go make someones day BEAUTIFUL.

Tuesday, December 8, 2015

DIY Holiday Pillow Covers ~DIY Home Expert Series~


Welcome back my Beauties!
I am sure just like me, you guys are 
getting down to the nitty gritty busy
Season!
I wanted to show you a quick way to add some simple and fun Holiday decor to your home
for very little money!

Come see how I took these plain old Canvas Pillow Covers and transformed them 
into something Sparkly for the Holidays~
Join me over at Furniture.com
to see how easy it was!
Head on over HERE To see the whole tutorial!

Wednesday, August 19, 2015

Pumpkins Cider and Hayrides Autumn Craft from old Cupboard door

I am trying to Motivate myself to get working on some Fall
Crafts. So I am recapping this old post in the hopes of being INSPIRED!
ENJOY!
artisbeauty.net karin chudy painted diy craft


Good Morning my Beauties.
Just a quick post to show you IN FACT that I did do an
Autumn craft this year..:)
I actually did it a couple weeks ago and just now
am getting around to posting it.
Its modeled after the one that Ella Claire did which I just loved.

I have a ton of these old doors in my shed thanks to a friend who remodeled her kitchen.
I save them for when I have just the right sign I want to make.
I just filled the the old hole from the knob and started painting.

I used some custom mixed colors on this to get the reddish orange on the edge.
and painted the middle white.
Wanting the sign to look old its nice because it doesn't have to be perfect.

Using my silhouette I just cut out the words "pumpkins Cider and Hayrides" in'
different fun fonts and then added the arrow.
I used acrylic paint to paint in the stencil.
When it was done I waxed and buffed the whole thing.
and now I can say I did an Autumn craft and get that whole monkey off
my back..LOL!!
I hope you enjoyed!

and now I really want some CIDER..:)
Have a BEAUTIFUL day...
Until next time,
Karin
Posted by Picasa
Liz Marie Blog
The Humble Brag Supporting Habitat for Humanity
ThePinJunkie