Showing posts with label repurpose. Show all posts

Thursday, November 30, 2017

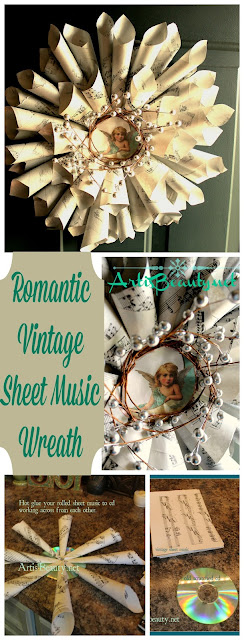
Graphics Fairy Sheet music wreath using OLD CD


I love resharing this wreath!
Come see how easy it is to create your own!
(You can follow me on INSTAGRAM to keep up with what I have been working on) so I thought I would share an Oldie but a Goodie!
Here is one of my favorites. My sheet music Christmas wreath.!


diy craft vintage sheet music turned christmas holiday wreath
Good Monday Morning my Beauties! Well Its official...
I have caught my kids CRUD. :(  Luckily
I had gotten this project I have been wanting to do done
before the wonderful virus set in.

I have a stock pile of old sheet music that I had gotten at a bag at a thrift shop for $1.
Some of its really old and I decided not to touch that stuff, but the rest is 70's and 80's classical.
So I thought I would use those to make my wreath. BUT I didn't have a wreath form. It hit me while
I was in my CRAP/CRAFT room that I have a bunch of old scratched Cd's in there.
They are round and sturdy and I thought an added bonus that a MUSIC wreath was going to be put on an old CD :)
(Bonus if you don't have sheet music you can go over to the Graphics Fairy and
she has vintage sheet music you can print off)

I started rolling my half sheets of sheet music and hot gluing them when they were rolled.
I then hot glued them to the CD working in a opposite pattern. (kinda like how you take the lug nuts off a tire..:))

I kept adding layers and then as I wanted it fuller I cut the half sheets in half again and made a middle smaller rolled section. When that was set I went over to the Graphics Fairy and got this cute little Vintage Angel

I added her to the middle using my hot glue gun and then used a piece of some silver sprigs that I had left over from Christmas Decorating.
copied vintage sheet music craft old cd hot glue gun graphics fairy christmas holiday wreath decoration
My Christmas Sheet music wreath now hangs on my front door.

I love the adorable little greeting that she is to people coming into our home.
Well, thats all I have for today..Hopefully by the time you read this
I am on my way to feeling MUCH better.
I hope you all have a BEAUTIFUL day!
Posted by Picasa
 The Graphics Fairy

Monday, October 31, 2016

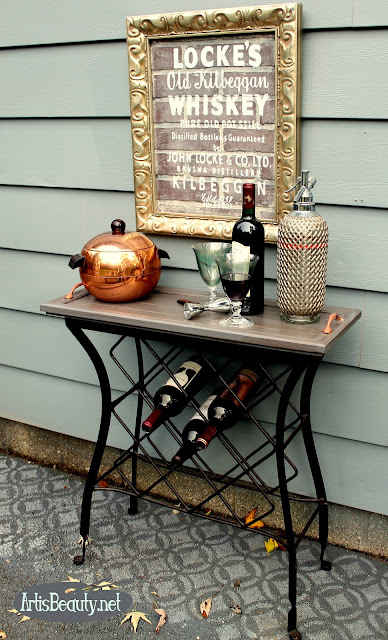
BROKEN TABLE and Old Cabinet door turned WINE BAR.


 Welcome back my Beauties. 
I have a fun little makeover today.
Come see how I rescued this old broken table and turned it into a Beautiful Wine Bar.

This post uses affiliate links to help you find the products I trust and love


wine cabinet from old cupboard door upcycled recycled diy
 One day while I was at the thrift store they were carrying this table out off the floor.
I asked if they were selling it and they said "yeah, but the top broke"
I asked how much they were going to charge and they said a couple bucks.
I grabbed that sucker and stuck it in my cart. 
I instantly knew what I would use to fix it.

I went right out to my shed and grabbed this old cabinet door I had been saving.
It was the perfect fit. 
I quick gave it a light sanding and starting working on my project.


I grabbed some old hardware that I had been saving and grabbed my valspar copper spray paint and gave them a couple coats of copper spray paint and started working on the other parts of my project.


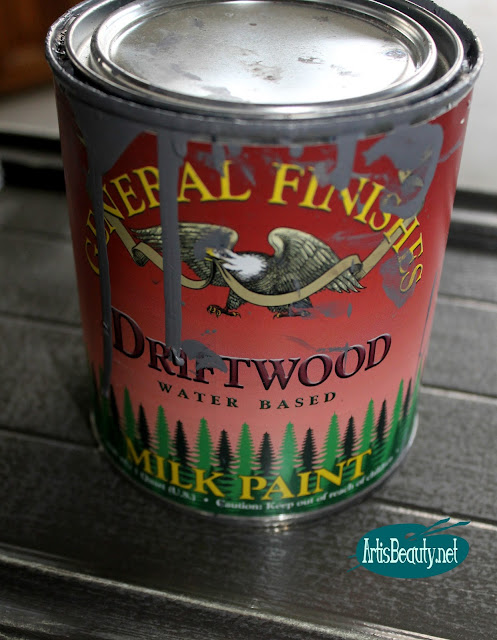
Next I grabbed my General Finishes Driftwood Milk paint and started painting the cabinet door.


walnut americana gel stains translucent stain paint finish diy makeover karin chudy artisbeauty.ne


Once it was dry I grabbed my Americana Gel stain in walnut and gave it an antique finish by wiping on and wiping off the stain.  
 
black and decker drill copper hardware old cupboard door cabinet turned wine bar diy makeover

Once it was all painted I used my Black and Decker drill to drill some holes and add my hardware to cabinet door so it could be used as a serving tray for the drinks.

salvaged cupboard wine bar diy recycled rescued makeover painted kilbeggan whiske

Once the handles were on the wine bar was ready.
The old door sits perfectly on top of the old base.
rescued recycled cupboard cabinet door turned wine bar metal wine bar diy makeover painted before and after

Perfect for serving and entertaining this holiday season.
upcycled cupboard cabinet door turned wine cabinet
I hope you enjoyed this latest makeover.
I was so happy to be able to save this old base by salvaging an old door that I had in my 
scrap pile.

wine bar from old table and salvaged cupboard cabinet door diy karin chudy artisbeauty.net
Until next time.
Have a Beautiful day!

Thursday, June 23, 2016

$5 Coffee Table turned Nautical Bench.


This post uses affiliate links to help you find the products I trust and love
Welcome back my Beauties!
Its time for another makeover and this time its time for our 
THEMED FURNITURE MAKEOVER.


Once a month myself, and some of my blogging friends get together and do a Themed Makeover.
This months theme is COASTAL


I picked up this table at a garage sale a few weeks back and new instantly this would be my nautical project.
I knew I could easily turn it into a bench.
First thing was to remove the top. 
I love these kinds of coffee tables because they have these great little screws all along the top that make them easy to remove.
I just grabbed my cordless drill and removed it.
You can see here where I had done the same thing to a longer table.


Once I had my table top off I grabbed my roll of batting and cut it a little bit bigger than the size of the top making sure I would have enough to roll over the edges to round it out.
After that I used my staple gun to affix my yellow anchor fabric to the table top.

Once the top was done I decided to use some Chalky style gray paint for the base. My fabric has very light gray graphics on it and I thought this would be a good way to compliment it.

And here she is all finished.
Not bad for a $5 table.

A total transformation!


I hope you enjoyed this makeover and I would love for you to pop on over and see what all my other bloggy friends have been working on for their themed furniture makeover.
Until next time,
Have a Beautiful day!

Tuesday, March 29, 2016

Old Coffee Table turned Upholstered Bench


Running around like a chicken with its head off, so I am hitting replay on this old post!


Hello again my Beauties!
I have another fun makeover for you today.
I have had this coffee table sitting in my garage for 2 years...
Shhhh don't tell my hubby I admitted it.
He gets a bit perturbed when projects sit and I don't do anything to them for a while. 
This one had confounded me. You see, coffee tables are not HUGE sellers around here,
let alone, long 70s fake laminate top coffee tables.
Now I know I could have simply painted it and tried to sell it as a coffee table,
but I knew it had a better purpose.
I just had to figure out what it was.

Well;  INSPIRATION always seems to hit me when I have about 10 other projects going on
and this project was no different.
I was working on another (5) projects when I had a face palm moment.
(actually I was moving my craft stash and found my batting and thought DUH...
Lets make it a bench!
So I unscrewed the top of the table from the base and got to work.

Once I had the top off, I grabbed my fabric batting, cut it to size and started 
stapling it to the board.
Once I had my batting stapled with it curving around the edges to make it soft all the way around 
I got to upholstering my fun fabric that I had picked out.


For those that ask "HOW", I say its like wrapping a present.
I pull the one side and staple it down, making sure to keep it in line;
then do the opposite side pulling it taunt as I staple it.
Then you go to the others.
When you get to the corners you carefully fold it in being careful not to bunch
and lay it nice and flat then staple it. 
After I was done with that I went on to painting the base.
I chose a nice neutral gray to go with the fabric.
I think you will agree...
It looks much better as a Bench than it did as that dirty old coffee table.

I hope you enjoyed this latest makeover!
Until next time...
Go make someones day BEAUTIFUL.