Showing posts with label kitchen reveal. Show all posts

Sunday, June 18, 2017

Creating an Eating Nook with IKEA benches


CREATING AN EATING NOOK BOOTH WITH IKEA BENCHES IKEA HACK DIY MAKEOVER KITCHEN ECLECTIC BOHO CHIC BOHEMIAN HOME DECOR
Welcome back my Beauties!
Today I am going to show you how I created my Eating Nook with Ikea benches.

kitchen makeover boho home decor eclectic style diy painted

Last week I showed you my Kitchen Makeover that you can see HERE!
Now I will show you how I created that cute little  Eating Nook in that odd corner of my kitchen that has been the bane of my existence for almost 20 years.


This post is a sponsored post or  uses affiliate links to help you find the products I trust and love

While working on my kitchen makeover, I was trying to figure out what I could do with the weird corner in my kitchen.
For almost 20 years I have put corner china cabinets or hutches there trying to just fill the space.
I could never figure out what else to put there.
I wanted to build a corner bench for the kids but knew I didn't want to do a full construction project incase I ever wanted to change up the kitchen again. (I know myself and I know how much I love to change things, so I try to do things that aren't PERMANENT so I don't have to worry about Commitment Issues with major construction issues :)) 
So one day I got on my computer and looked up simple benches. 
I came upon these
 IKEA Molger benches.
I linked to the ones they sell on Amazon if you don't have an IKEA near you. They are much cheaper at IKEA but I know not everyone has that option.
I spent a total of $75 on the two benches straight from Ikea. 


IKEA MOLGER benches dark walnut diy blogger breakfast nook kitchen makeover eclectic boho chic home decor

Once I got my benches I started assembling them.  You can see here I have one together and just starting on the second one. 
I got my Bistro table from World Market but only because it was on SUPER SALE and I had an awesome $10 gift card.
http://amzn.to/2kZ8r0H
If I hadn't scored that I would have bought this one from AMAZON. 

ikea mogler benches turned corner breakfast eating nook home decor

Now you can see from this picture how that little space in the corner would have been left open. I knew if I left it open then stuff would just fall down and the kids would lay and put their feet on the wall. 

So I painted up this little square table that my sister in law had given me and sawed the legs down to just the right size to put in the corner.
corner gallery wall brash geometric shelf boho chic eclectic style home decor
Once I had my benches and tables in place I could start decorating.
I wanted a fun eclectic feel so I purchased some 
Embroidered Mandala throw pillows from a local home store.
For the walls I grabbed one of my canvas prints from our trip to IRELAND that you can see HERE.
I also put up this really cute geometric metal and glass wall ledge to put some decor on.
The other wall is where I hung my "Drink More Travel Often"

diy eating nook using Ikea benches Bistro table corner booth bohemian decor eclectic style kitchen table reading nook travel wanderlust
And that, my Beauties,
was how easy it was to create this simple Eating Nook using Ikea Benches.
It was so fun and I love the FUNCTION that it added to our dining area.
No more wasted space just filling a cabinet to fill that corner.
My daughter sits and draws here, my son loves to eat his breakfast here, and I love to drink my coffee here.
Even though we have lived in our house for almost 20 years, it's so fun to change things up to make it feel different once in awhile.
No need to pack boxes and up our mortgage; just a few hours of work and the place feels NEW!
I hope you enjoyed this latest DIY project.
I seem to have been on a roll lately, but I think mostly it's from being trapped in the house during these dark and cold months.
Hopefully the sun will soon be shining and I will be back showing you furniture makeovers.
Until then,
Go make someone's day BEAUTIFUL!

Friday, February 10, 2017

Budget Friendly Kitchen Makeover using the power of Paint!


budget kitchen makeover using power of paint pittsburgh paint diy makeover
Welcome back my Beauties!
I am finally ready to show you my kitchen makeover!


Now if you have been following me for a while you know I paint my house A LOT! 
I mean, I do it in stages but I love how easy it is to change the whole feel of a room with paint!
My kitchen has been made over probably at least 6 times since we have lived here the last 18 years.
The last makeover was when I painted my cabinets.

Click here Kitchen Makeover to see it.


http://www.artisbeauty.net/2014/01/80s-oak-bow-front-china-cabinet-turned.html
You can see my walls were yellow.
While I loved the warm of the yellow in our almost sunless winters here in Michigan, I decided I wanted to brighten up the kitchen with a lighter color. 

This post is a sponsored post or  uses affiliate links to help you find the products I trust and love
So I decided to give the kitchen a budget makeover with some paint!
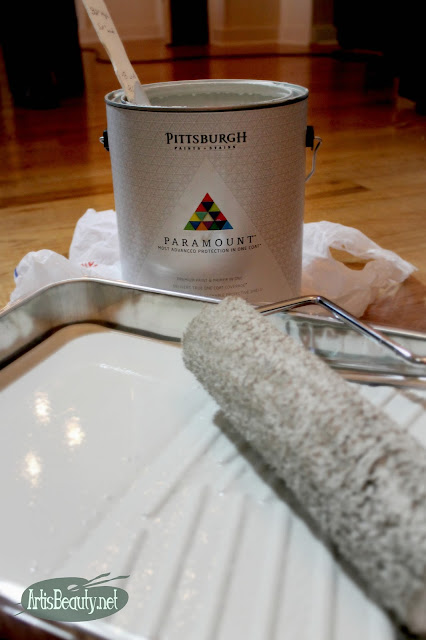
For that I chose Pittsburgh Paints & Stains® Paramount™. 


PREPPING KITCHEN FOR PAINT MAKEOVER DIY BLOGGER

Here you can see my hubby and the dog helping me prep the walls and take down all the decor. 
You can truly see here in the dark January winters how yellow the room looks when there is no outside light coming in.
EDGING KITCHEN WITH PAINT CUTTING IN BEFORE ROLLING

Here it is all trimmed out getting ready to roll on the paint!


pittsburgh paint paramount ghost writer kitchen paint primer in one makeover

Now as I said above, I have PAINTED my house A LOT!
and I wouldn't be telling you about this paint if I didn't love it. 
I know it's weird for a person to get excited about paint,
but I do.
I have always loved paint...since as long as I can remember.
So when I find a great paint I don't mind telling you. 
I would recommend Pittsburgh Paints and Stains©  Paramount™ to anyone!
Paramount offers a paint and primer in one, which saved me a ton of time and still provided a beautiful finish with vibrant coverage.
The color I used was Ghost Writer MEN7135-3
This paint is available exclusively at MENARDS® stores.
after paint with pittsburgh paint paramount in ghost writer gray blue fixer upper style eclectic boho
Look how much brighter my kitchen looks already!

kitchen corner booth made from ikea benches boho style eclectic bohemian travle diy makeover kitchen booth

I changed up the corner that always had the china cabinet in it,
and I will be coming back with a post about that later.
painted kitchen makeover pittsburgh paints paramount ghost writer blue gray diy makeover before and after eclectic kitchen boho chic home decor
I love how it brightened up my kitchen and I really love how it looks with my Dark gray cabinets.
I should mention that while I change a lot of things in the house some things are hard to let go of.
You see those signs above the cupboards.
Those were one of my very FIRST blogging posts.
You can see them HERE.
So while I change a lot of things, I also keep things that have sentimental value! :)
Budget Friendly Kitchen Makeover using the power of Paint pittsburgh paramount boho bohemian diy blogger eclectic kitchen
There you have it.
My Budget Friendly Kitchen Makeover using the power of Paint!
The whole family is loving the brighter and lighter feel of the kitchen.
That is why I love paint so much. A color can change your whole attitude! 
Thank you to Pittsburgh Paints & Stains® for providing the paint for my post!
:)
Until next time,
Go Make someone's day BEAUTIFUL!

Friday, October 30, 2015

Painted Kitchen Cupboards Makeover REVEAL


Welcome back my BEAUTIES!
I am FINALLY getting around to posting our Kitchen Makeover REVEAL.
You may remember a couple weeks ago I promised you I would post the reveal the next week..

UMMMM......YEAH....I never got around to it.
Wanna know why?
For REALS???
Here goes..
I JUST DIDN'T FEEL LIKE IT.
I LOVE my Kitchen so much now, but between painting the cupboards,
doing the DIY blogger roundup in Chicago (which was at the same time as me making over my kitchen)  and the plethora of other projects I have going on for different companies I honestly could not bring myself to photograph edit and post about it.
For the Non DIY'ers who don't understand the "Process" that a post takes; let me explain.
Its not JUST the project...that I do on a daily basis.
BUT, once the process is done there is about a MILLION other things us bloggers need to do.
First thing being....CLEANING UP OUR MESS.
You see we tend to be BIG mess makers, so while we are working on a project I tend to push all the CRAP that was in the room aside, and have to keep taking pictures of the process.
Then after the cleaning we have to STAGE.
(which is not my THANG...I am sure I have told you before)
Being A.D.D. I know I have a limited attention span before I get tired of staging and move onto something else. (this is one reason I am sure my home will never be magazine worthy. I can't see myself NOT ever being so busy that I have time to do a proper staging because I know one of my 4 kids or hubby...or dog will come in and mess it up in seconds)
NEXT, Photographing time.
This can take anywhere from a half an hour to a few days.
In this case it was WEEKS.
We live in an old house and no amount of external light systems or natural light 
would show in the pictures how it looks in real life.
THAT caused me the frustration to postpone my post; and my A.D.D. to flair up and find Lots and LOTS of other projects to focus on until the kitchen makeover nagged and nagged at the back of my mind to make me JUST DO IT. 
:)
and that finally happened.
SO HERE YOU GO...
FINALLY! 
(and thanks for listening to my little explanation of my METHOD and what my BRAIN goes through on a daily basis)  
Oh and even writing the above was a procrastination :)

 As I showed in the BEFORE post, this was me trying to decide on a color.
I was mixing and trying to decide how DARK I wanted to go. 
Well by the time I decided I went with a color straight out of the can.
It was just the deep hue I was looking for.
and since it was in the kitchen I chose their HIGH PERFORMANCE finish in Satin.
So I spent the next few days painting cupboards which as you know is always a FUN time.
The nice part about this  makeover is that I was leaving my upper cabinets the cream color 
that I had painted previously.
You will see from the pictures that although we are in an older home (built in the 60's) they LOVED storage.
WE have a U shaped kitchen with tons of cupboards . BUT that means lots to paint, so not painting the uppers saved me tons of time.
So now that the cupboards were painted it was time for some new hardware. 
I am normally a copper or a bronze girl, but I really wanted to do something fun and different with the hardware.
That's where HICKORY HARDWARE came in.
They had these fabulous pulls and knobs that look just AMAZING with the dark deep gray.
They went together like peanut butter and jelly.
I couldn't have been happier with how it looked.
PLUS, as I was getting ready to write up my post someone shared this post from HGTV...
Hey that color looks almost like mine.
For once in my life I just might be ON TREND..(probably not but I can dream.:))


I loved how the hardware pulled together the stainless steel appliances but yet still looked good with all my vintage kitchen decor.

I have to tell you. This paint is so awesome. Since it took so long to post, I had a crazy amount of time to see how it did in the kitchen. 
IT IS AWESOME. 
My kids and I love to cook, and even more..make messes. This paint has withstood all of that.
I love the added strength that the hard finish added.
And its still looks like I JUST painted it.


So there you have it.
The Reveal is done with the best pictures I could get.
Its funny because I took about 300 pictures and I didn't like any of them.
I have gotten so critical with myself with photographing that I can see each and every single FLAW.
Where the light is reflecting off of a door,
or where there is a shadow that I can't control no matter what kind of lighting I used.
I finally had to make peace with the fact that no matter what I did I was going to find something
I didn't like about how I staged it and just like life I was gonna have to LOVE them for what they were.
The pictures may be slightly flawed but that's what makes them REAL.
And I couldn't be happier.
So there you have it.
The Kitchen Reveal that took longer to post about than it did to paint it.
I hope you enjoyed this unusually LARGE and wordy post.
 I finally accepted my imperfections and I am happier that way.
Until next time.
Have a Beautiful day.

To accept ourselves as we are means to value our imperfections as much as our perfections. ~ Sandra Bierig


 Disclosure: Remember all opinions I share about the products in my post are 100% my own with complete honesty.The post contains sponsored links

http://www.casawatkins.net/
http://farmhousechicblog.com/2015/inspired-by-you-1/

Monday, June 9, 2014

Elkay Kitchen Sink and Parma Faucet Remodel Reveal

http://arttisbeauty.blogspot.com/2014/06/elkay-kitchen-sink-and-parma-faucet.html
Good Morning my Beauties!
 I had a few minutes to spare this weekend and only a FEW;
so I thought I better quick snap some pictures of our new Kitchen Sink and Faucet Reveal.
(Meaning, it was clean, so this was the perfect opportunity to take pictures)
What can I say..we live REAL LIFE here and sometimes Real life ain't pretty. :)
I have to tell you...
I am IN LOVE! 
I mean whats NOT to love!????
I know, I am betting like ME; You are probably not a fan of doing dishes...
I HATE it...but this SINK and FAUCET makes things a LITTLE bit more Enjoyable.
Here is what we were dealing with before.

 I will have to admit..I am not a SINK fan...I have not had good luck over the years
with out sink choices....we have had enamel and cast iron and then this "quartz" type sink.
Non of them could stand the test of the
"ART IS BEAUTY" family.
My Hubby is a home brewer...
I am an artist...
My kids...well they are kids....
Our sinks take a beating, from paint to brewing equipment,
to kids leaving food sitting in the sink..
Its a mess...
This past sink was suppose to be a NO STAIN sink..
Yeah, it was....for a while....but even it couldn't handle us..
That's when we knew..it was time to go STAINLESS STEEL!
I won't bore you with the Chemical Miracle that this amazing compound is,
but sometime...when you are bored, look up how it was discovered...
then, someday when you are on a game show you will answer the winning question
of how stainless steel was invented...You won't be sorry..and you can
WOW your friends at dinner parties with your incredible knowledge...
You're WELCOME! :)
But I digress....
Now it was time to replace the sink..

That's when I called in my super sexy (will work in his pajama's) 
Plumbing contractor...by the name of HUBBY
First things first..we took the doors off the cupboard..this makes it much easier to get to your work space...
2nd...TURN OFF WATER SUPPLY  
we have shut offs under the sink but just to be safe we always shut off the main water too..
and when disconnecting we keep a bucket underneath for the water in the lines and pipes that is sure to drain out when disconnected.

Once the sink was disconnected underneath and the mounting brackets were off we were 
able to remove the sink.
Now for the fun part..
after pulling out the old sink we needed to use a razor blade to carefully scrape off the old
caulk from around the old sink.
Then it was time to dry fit the sink and faucet .
It was finally time to put my new beauties in.
National Builder Supply was so kind in supplying me 
with the most awesome sink and faucet
and AMAZING customer service.
I will admit..even with me triple measuring everything and checking schematics
I still managed to screw it up and ordered 
something that wouldn't fit..
I had even said to my husband...That I had KNOWN..I was gonna screw SOMETHING up..
its just the way of DIY.
Well National Builder Supply was AWESOME with my return and speedy
exchange.
They didn't even make me feel stupid..
Which I am honestly pretty good at..:)
Once I had finally worked out what was going to work with my kitchen
and the DANZE Parma Kitchen Faucet. 
I am so happy with my choices.
Now onto the rest of my INSTALL.
Once we got the sink and faucet fitted it was time to start hooking up the plumbing.
I will admit right now, nothing ever goes as planned, which is why we NEVER do
plumbing on a Sunday, when if you have an emergency, you are SCREWED...:)
(just my 2 cents on the matter...I don't know how many horror stories I have heard about this happening to people)
We got the sink centered and then we installed the brackets to keep the sink in place.

Then it was onto the pipes.
Here is my hubby working the PUZZLE that is plumbing...to add to the fun, we decided to forgo our
old disposal..all it did was encourage the kids to throw soggy cereal and all kinds 
of other disgusting things in the sink...
Now they are forced to finish their cereal...(two birds...one stone)
Also we went from two drains to one so hubby had to cap off one of the old drains and re route the dishwasher that used to drain into the disposal.
Luckily, he has done this plumbing job many times and is WAY more patient than 
I ever would be.
 Needless to say, it was worth the effort and he was rewarded with
lots of kisses..(and me promising to wait to ask at least a week for him to HELP me with another project)   :)
 I have to tell you too..that this fits his 5 gallon brew pot and my giant restaurant skillet with room to spare...No more teetering pots and pans trying to fill and clean only to have them slip and spill all over the place.
I also waited a couple weeks to post to make sure that this stood up to our TOUGH set of standards.
I can tell you...Its amazing..I am honestly KICKING myself for not doing it sooner.
The sprayer on the sink makes for easy clean up and I feel like such a GOURMET 
with it in my kitchen.

I hope you enjoyed this latest Makeover...
Please note.
 I received product  for reviewing National Builder Supply products. All opinions are genuine.
Because honestly..have you ever known me to NOT be..:)
Now go out there and make someones day BEAUTIFUL..
I will be in my KITCHEN staring at my sink and faucet. 


Tuesday, July 31, 2012

Kitchen Cupboard and Kitchen Reveal.......FINALLY!!!!!!


I hope you guys are ready for a DOOZIE  on this one...Our kitchen has always, and I say...
ALWAYS been under construction or redecorating. Since we have moved into this house back in 1998. We had a new baby..Our daughter who is NOW 14, and NO money.
So we did things bit, by bit, by bit.
ABOVE you see what it looks like now...but over the years, I have found a FEW pictures..
and when I say a few, thats what I mean because we finally figured out that our kitchen has been painted at least 10 times since 1998 and the cupboards have been updated with trim and painted 5 times...WHAT???? I don't have a problem. :)
Our house was built in the heyday of the 60's when; REALLY, there was no STYLE.


 If you can see from this picture when we moved it. We had tons of cupboard space yet...the kitchen had a window but .... as you can see..we were completely shut off from the rest of the house.

See the china cabinet...the first thing I did while hubby was at work was rip it out..to open up the room a little bit...I mean REALLY....look at all the cupboards and work space..yet the table was crammed in on the OH SO LOVELY brown carpet, to match the original brown linoleum in the kitchen.Here is my baby girl...
 sitting in front of the wall that now has a passage way into our living room...
Its funny cause my kids grew up used to construction always going on in this house. :)

 here we are  later putting in the hardwood floors.. that now go ALL the way into the kitchen.
 and here is  a picture of when for a few years I had red bottom cupboards and cream top cupboards..
I loved this look but then everyone started doing it, so I HAD TO CHANGE..If you look on pintrest there is a picture that has the exact same colors I had in my kitchen back in 2006-2008
then I went to cream and cream and we had gotten new counter tops and we put in the faux tin backsplash about 4 years ago...

So now it was time for a change again...I got out my new fave...Ce Ce Caldwell's "smokey mountain"
and started painting. I loved how fast I was able to get my kitchen cupboards painted...When they were dry I put on the Ce Ce Caldwell's Satin finish and they LOOK AWESOME....


well, if I am painting cupboards...then I have to paint walls...:) Out with the pumpkin orange...

and in with the creamy yellow..

ahhhh...:)

add all of my either Goodwill finds or Home Made artwork....

and we are getting somewhere...

Here is a shot of the back splash we did..I love it...

My sunflower painting
and one of my very first blog posts..my half table

My kitchen signs up there on the bulk head..

my old French roadsigns made from cupboards..

and the finished dining room......GEEEE I wonder why it took me so long to get this post done....if you look closely you can see the pass through we put in.
GOSH I am tired...LOL!!!
I hope you enjoyed this little history of my kitchen...I am sure it will change again someday, but for now...I am enjoying it....DONE!!!
Have a BEAUTIFUL day.
Posted by Picasa
Full Circle Creations
My Uncommon Slice of Suburbia
Mod Vintage Life
The 36th AVENUE

Shabby Art Boutique
Furniture Feature FridaysThe Shabby Nesthttp://decortoadore.blogspot.com/2012/08/fridays-favorite-pin-2.html
Too Much Time On My Hands
you are talking too much />
My Uncommon Slice of Suburbia
Home Stories A2Z
http://salttree.net/Tip Junkie handmade projects
Becolorful</ a>
http://anightowlblog.com/category/create-inspireAltar'd Furniture Creations