Showing posts with label roadside rescue. Show all posts

Thursday, September 20, 2018

Roadside Rescue Vintage Bicycle Advertisement Dresser


This post is a sponsored post or  uses affiliate links to help you find the products I trust and love


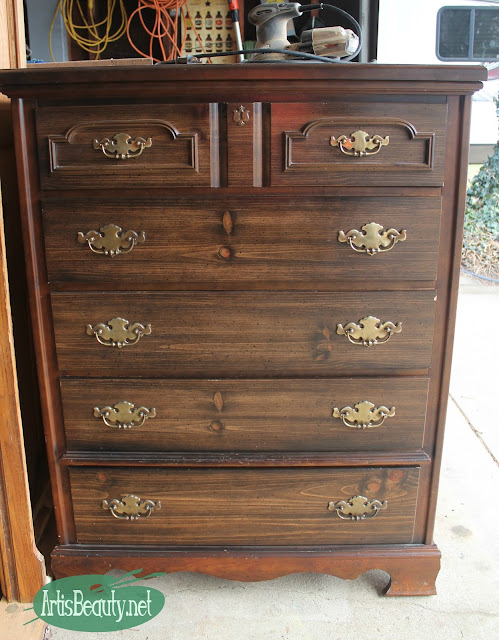
roadside rescue dresser before given vintage advertisement stencil makeover


Welcome back my Beauties.
I hope your week has been treating you well so far.
I am working on makeovers and even redoing a dresser for my husband now that the kids are back to their school schedules.
But this dresser I did this summer.
One day my husband was out walking the dog and saw the neighbors had thrown out this dresser. 
I must admit, I have saved many pieces but I was a little nervous about this one.
It was pretty beat up and I almost thought about just not doing it.
But I decided there was no harm in trying to bring this baby back to life.
First things first was I stripped off those nasty stickers stuck to the front of the drawers.
Once I started cleaning off the stickers I realized that with a good scrubbing and sanding the original wood grain was starting to show through. It was almost as if they had used too dark a stain and it just needed a lightening up.
At that point my motivation was in full gear.
general finishes driftwood water based milk paint vintage bicycle advertisement dresser makeover
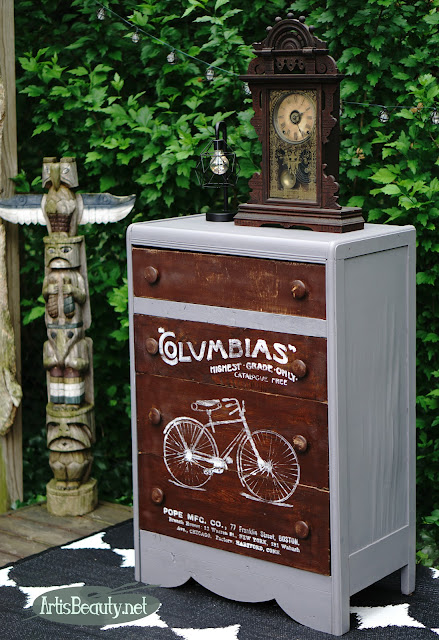
I decided to use my General Finishes Driftwood gray for the base of the piece. 
The sides of the dresser were beyond trying to sand down and I figured the paint would help the drawer fronts POP
general finishes snow white milk paint vintage columbias bicycle vintage advertisement dresser makeover

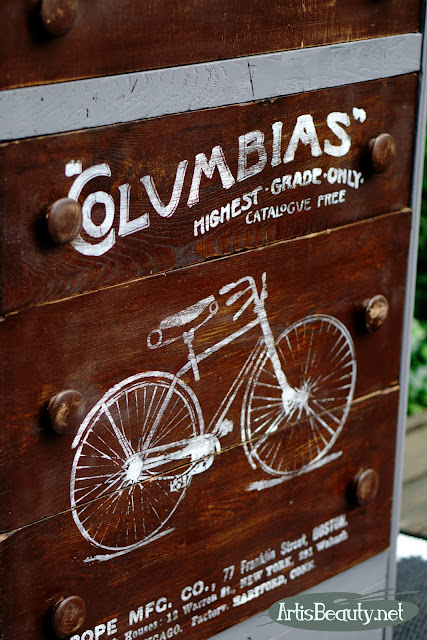
Plus I had decided to go FULL VINTAGE on this dresser, with my Vintage Columbias Bicycles advertisement Stencil and figured that would pair nicely.
I used my General Finishes Snow White Milk Paint for the stencil.
After it was all dried I gave it even more light distressing and put the old hardware back on. 
free roadside rescue dresser turned vintage columbias bicycle dresser upcycled recycled pope mfg. co. BOSTON
I LOVED how it turned out!
I had surprised myself that I was able to save it and that 
I actually thought it looked good. :)
vintage dresser makeover before and after columbias highest grade catalogue free pope mfg. co 77 franklin street boston
With the old original wood and vintage advertisement I just felt like it was a match made in heaven.
vintage columbias highest grade bicycle advertisement dresser roadside rescue makeover recycled upcycled stencil before and after veneer
Plus I am happy to say that someone else did too.
It SOLD and I am so happy to have saved a piece from being crushed and dumped in a landfill.
I think I will try to remember that the next time I see a piece sitting on the side of the road and I start to doubt that it can be saved. 
I don't know why I doubt myself?
I mean you can see HERE all the free pieces I have rescued!
https://www.artisbeauty.net/search?q=roadside+rescue
You would think I would be used to saving them by now.
I have yet to chuck one in the fire pit, so here's hoping that I can keep up with saving all those stragglers that the husband brings home with the proud little smile on his face. :)

before and after vintage columbias highest grade bicycle advertisement dresser roadside rescue makeover recycled upcycled stencil before and after veneer
Well, I am off to try to work in the garage if the mosquitoes don't carry me away.
Wish me luck!
Until next time,
Have a BEAUTIFUL day! 


Monday, January 15, 2018

Roadside Rescue Eclectic Emerald Green Dresser Makeover


roadside rescued dresser chest of drawers makeover before veneer removal and repair
Welcome back my Beauties.
I have been waiting to show you this Roadside Rescued Eclectic Emerald Green Dresser for a while
and I am so happy to finally being able to get around to editing and posting it.


http://www.artisbeauty.net/2017/03/before-and-after-rescued-dresser.html
This post is a sponsored post or  uses affiliate links to help you find the products I trust and love

It may look a bit familiar to you if you have been following me for a while. 
You can see the partner to the piece I did HERE
Both pieces were rescued at that same time and took almost the same amount of work to bring them back to functioning pieces of furniture.


wood veneer removal roadside rescued dresser makeover before and after repair boho chic
One of the first things that needed to be done with both pieces was to remove all the damaged veneer off of them.
This required a few days, some slivers and major tenacity.
As with the first piece the veneer did NOT want to come off.
Every method was tried again. You know....the Wet Towel to release the veneer. The heat gun to also try to release the glue holding the veneer. None of those worked. 
The only thing that did was to use a good ole paint scraper
I worked for hours to get every little bit I could off.
Once the veneer was removed I used my Belt Sander to get it to a nice smooth finish and remove all the little bits of veneer that were being stubborn :)


veneer removal sanding and finishing of roadside rescued dresser top finish

I mean, look at that wood underneath. 
I sometimes wonder why they laid the thin piece of wood over the solid slats of wood underneath. 
For the top I finished it off with the same finish as the previous piece.


general finishes emerald green water based milk paint roadside rescue dresser makeover before and after
But for the base I wanted a little more POP!
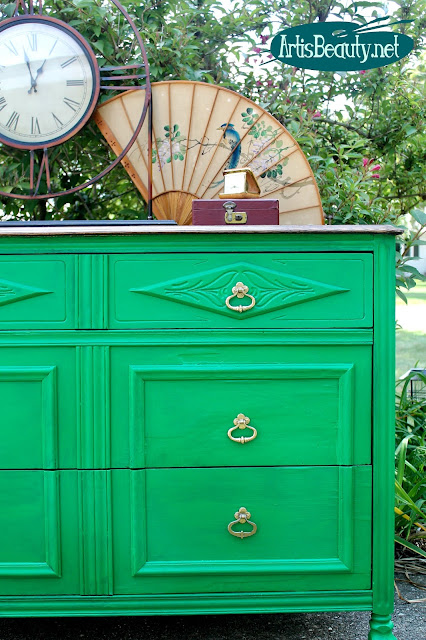
SO I chose General Finishes Emerald Green Milk Paint.
I gave the base 2 coats and cleaned up the original hardware and put those back on.

eclectic emerald green roadside rescued dresser before and after makeover veneer removal repair diy
I think you will agree that the green made it really POP!

general finishes emerald green  boho chic dresser makeover before and after roadside rescue water based milk paint
I actually tried to figure out a way to keep it for my own house, but as you know I can't keep everything.
So it went to my booth and it is now in someone else's home getting a second lease on life.before and after Roadside Rescued Dresser Makeover Emerald Green Eclectic Boho style

I think besides the green happy paint, the thought of keeping another piece out of the landfill makes me even happier.
I hope you enjoyed this latest makeover.
I am going to be a busy little bee
working on some more pieces
so be sure to check back to see what else I am working on.
If you are new here you can follow me over on 
I share a lot more of DIY in the moment stuff on there and would love to have you join me.
So until next time,
Have a BEAUTIFUL day!

Saturday, August 5, 2017

Emerald Green Rescued Dresser Before and After


emerald green boho dresser makeover BEFORE roadside rescue Free makeover diy blogger
Welcome back my Beauties!
I have a bright and beautiful makeover for you today!
A couple weeks ago my husband was out taking the dog for a walk and saw our neighbor had this dresser out for the trash. He quickly walked home and asked me if I wanted it.
I gave him the "LOOK" that conveyed "of COURSE I do!" and "HURRY UP BEFORE SOMEONE ELSE GRABS IT!" 
(normally I would have run out with him, but I had literally just stepped out of the shower)
The next thing you know I see him walking back up the road pushing this on my dolly...He didn't even mess around with the truck...he figured he took the dog for a walk, he might as well take the dresser for a walk! :)
It was in ok condition. It was a mix of particle board covered in "WOOD" looking stickers and solid wood.
The top was in almost perfect condition just needed to be cleaned up.
But the base...that needed some LOVIN!
This post is a sponsored post or  uses affiliate links to help you find the products I trust and love
general finishes Emerald green water based milk paint dresser makeover artisbeauty karin chudy
I wanted this dresser to POP and show off a little after being left by the curb, so I chose


first coat of paint emerald green general finishes water based milk paint painted dresser makeover

Here you can see it after just one coat!
It was starting to transform before my very eyes.
Since the hardware was still in great shape, all I did was clean those up and spray them with some shiny gold paint.
Once it was all dry, she was ready for the BALL!
emerald green eclectic bohemian chic roadside rescue painted dresser makeover before and after

While I am always happy to score free furniture, 
sometimes I wish the people who got rid of them could see how a little bit of love transformed them.
(but I still want the free furniture 😊)
Emerald Green Gorgeous Bohemian Eclectic Rescued Dresser Before and after painted makeover general finishes

This will be another dresser that is hard to part with,
but I am happy knowing that I saved another piece from the landfill.

emerald green rescued dresser makeover before and after general finishes water based milk paint boho chic eclectic decor
boho chic Emerald Green roadside rescue dresser painted makeover before and after eclectic home decor artisbeauty.net

I hope I inspired you to try out some color in your life and see how much it can transform a piece!
Until next time,
Have a BEAUTIFUL day!

Monday, July 24, 2017

Funky Farmhouse Rescued Table and Chairs Painted Makeover!


before free table and chair fixer upper makeover painted diy farmhouse style
Welcome back my Beauties! 
Sorry to be away so long but Summer is one of those times we 
suck the life out of. 
We enjoyed our hiking trip to Utah and have taken a few days to 
get back into our regular schedule.
I am still in the process of going through all of my projects from last year when we lost my Mom.
This was one of those big projects that I did and quick photographed and brought to my booth and never had a chance to post. 
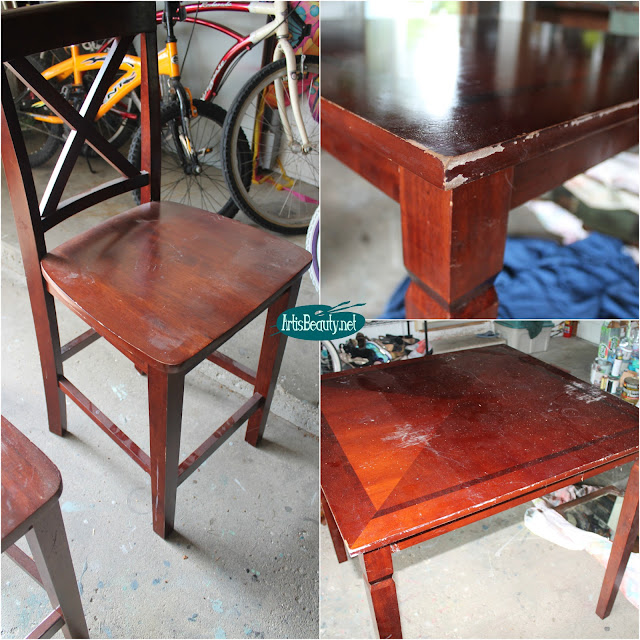
You can see from the above picture it was pretty beat up.
I picked this up free on the side of the road.
Structurally it was in great shape but the finish was destroyed.
I decided to give it a face lift with some funky and fun paint colors for a Funky Farmhouse feel.

This post is a sponsored post or  uses affiliate links to help you find the products I trust and love
wet blend gray painted table top diy farmhouse style bistro table makeover
I knew I wanted to go with a two tone just to play off the chairs from the table base.
For the top I used two different grays and wet blended them.
Working the two colors together while wet to give a slight layered finish. 

mineral painted custom color wet blend paint fixer upper diy farmhouse funky bar height table makeover

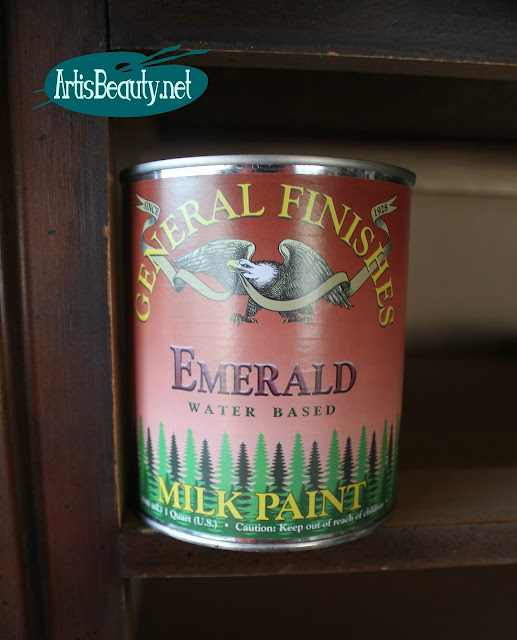
I used General Finishes custom color creator to mix up
and 


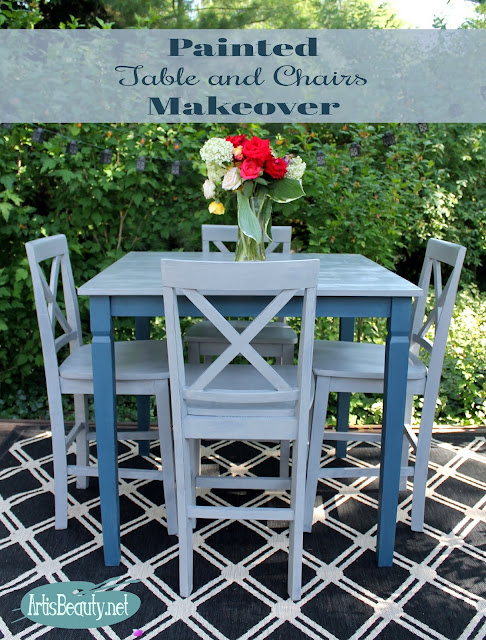
funky farmhouse boho chic rescued table and chairs painted makeover diy bohemian

I think you will agree it transformed this beat up old roadside rescue high top table and chair set into a funky and fun Farmhouse Style set!
\roadside rescue free table and chairs custom painted makeover fixer upper diy farmhouse style
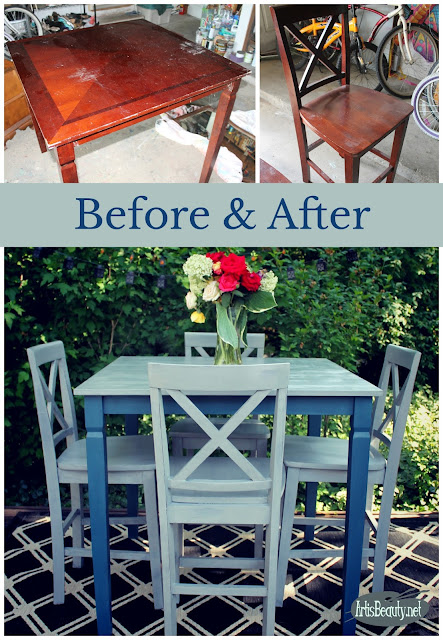
It's hard to believe it was the same set!
before and after eclectic bohemian rescued table and chairs painted makeover fixer upper farmhouse funky

I hope you enjoyed this latest makeover and I hope you are all having a BEAUTIFUL summer!
Until next time,
Have a BEAUTIFUL day!

Friday, June 30, 2017

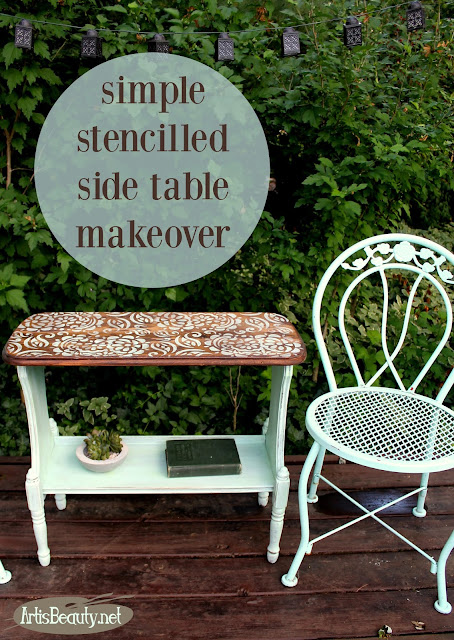
Simple Stencilled Side table MAKEOVER


roadside rescue small stencilled side table makeover removing veneer stencilled diy project
Welcome back my Beauties! 
Sorry I have been so absent lately.
A year ago my Mom got sick and we lost her a few months later.
I basically have been kind of floating through the last few months trying to re navigate my life without her.
I feel like I am living in an alternate world sometimes.
Our lives have gone back to somewhat normal routine, yet something is always missing. 
What makes it hard is that I also have so many makeovers that I was working on when she got sick, so to sit down and start going through these projects is a little difficult.
It brings me back to when we were dealing with so much yet still trying to get my work done to sell at my booth.
I have to say seeing these projects is getting a little easier and I am finally ready to start showing what I was working on back then. 
Mostly because my momma LOVED a good project.
The worse it was in the beginning the better.
This is one of those projects.
removing damaged veneer simple stencilled side table makeover before and after
My father in law had picked this old sad table up out of someones trash. He wasn't sure I could do anything with it, but once he saw my face when he gave it to me, he knew it was a mistake to doubt me. :)
The veneer was in awful shape but I knew from experience it just needed a little elbow grease and that stuff would be gone in moments.
I started by prying off the loose veneer and then using the soaking method to loosen what was left.

simple stencilled side table makeover paisley mint green deco art americana decor paint
Once I got it all scraped off I could move on to making her pretty.
This post is a sponsored post or  uses affiliate links to help you find the products I trust and love
ROCKWELL RANDOM ORBITAL SANDER simple stencilled side table makeover paisley mint green deco art americana decor paint
I grabbed my 
and gave the top a good smooth sanding
rustoleum wood stain small sidetable stencilled paisley makeover before and after
Then I grabbed some 
and stained the top.
http://amzn.to/2tnV4LX
While the top was drying I painted the whole base of the table with
paint.

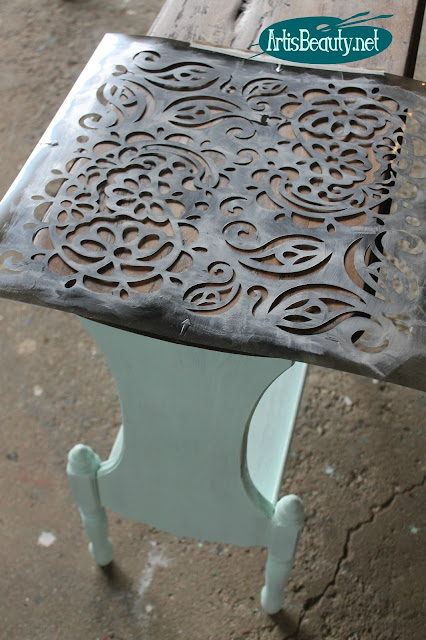
paisley stencil diy side table stencilled makeover before and after dumpster dive roadside rescue
Then for the fun part. I grabbed my 
PAISLEY STENCIL and using the same mint paint from the base I stencilled the top of the table.
I was in love with the dark and light contrast.
I spray sealed the whole piece when it was dry.
simple stencilled sidetable makeover paisley boho roadside rescue vintage makeover BOHEMIAN DECOR

I love how the stencil on top of the dark wood brought the whole piece together.
roadside rescue simple stencilled sidetable makeover paisley boho roadside rescue vintage makeover BOHEMIAN DECOR
I still can't believe this was the same table that someone had thrown in the trash.
simple stencilled sidetable makeover paisley boho roadside rescue vintage makeover
But as usual, those are always my favorite makeovers! 

BEFORE AND AFTER roadside rescue side table stencilled makeover boho removing damaged veneer repair staining painting
simple stencilled sidetable makeover paisley boho roadside rescue vintage makeover


I still can't believe the difference.
I also find it funny that I have never seen another table like this before.
I have seen a lot of furniture in my day, but none like this.
If you have any idea what it was called I would love to know!
In the next few weeks I will be show a few more makeovers from last summer.
It takes me a little longer to go through the pictures to edit, but hopefully I am still making my momma proud.
Until next time,
Have a BEAUTIFUL day.

Friday, March 31, 2017

Roadside Rescue Free Russell Woodard MCM Patio Chair set Spray Painted Makeover


(hitting replay of one of my favorite makeovers that I kept) 

Hello again my Beauties!
(UPDATE...thanks to an awesome reader I found out these are Highly collectible
 Mid-Century Modern SPUN Fiberglass Russell Woodard Chairs....I am so glad I kept them) 
I have been meaning to show you this makeover for over a month now.
I was going through some pictures on my computer and realized I never showed you
this makeover.
 One night over a month ago on a walk we came across three of these chairs for free on the side of the road.
Well...as a SUCKER for FREE furniture you know I picked them up.
The one above went to my booth but the other 2 were going to be mine.
They just needed a little WORK.
 Here is a close up of the wicker and cushions before...
They were kinda....well...YUCK.
The cushions were dirty and out dated and the wicker had lost parts of its old paint job,
but the chairs themselves were oh so COMFY and I love the cool style!
 
I quickly gave the chairs a couple coats of Black Spray Paint and got to
work on the chairs.


 Now I tried to be FANCY with the cushions and use this fancy dancy special spray paint...
Well, as you can tell..NO, it didn't work.
The plastic mesh type material was no match for the expensive fabric spray paint.

So I went with my favorite standby!
I grabbed a couple cans of my favorite Rustoleum spray paint and gave the cushions 2 coats.
It worked perfectly.
I mean..why had I gone through all that trouble before I tried good old spray paint?

 The nice part about forgetting to post is that I can tell you..
the spray paint has held up FABULOUSLY. 
No flaking..No Peeling...They look as good as they did the first day.
I love them and we have been putting them to good use while
we FINALLY enjoy some nice weather here in Michigan!
Until next time;
go make someones day BEAUTIFUL!